User Guide
Running DVR-Scan
After installation, you can run DVR-Scan by clicking on the application shortcut, or running dvr-scan-app from a terminal. If you downloaded the portable version, run dvr-scan-app.exe.
The dvr-scan command is the command-line interface for DVR-Scan. To launch the GUI, run dvr-scan-app. For help with the command-line interface or config files, see the Documentation page for details.
Scan Wizard and Advanced Mode
DVR-Scan has two views. The Scan Wizard walks you through a scan step by step: add videos, pick a preset, choose an output folder, and scan. Advanced Mode (described below) shows all settings at once. You can switch between them at any time using File -> Scan Wizard in Advanced Mode, or the Advanced Mode button in the wizard.
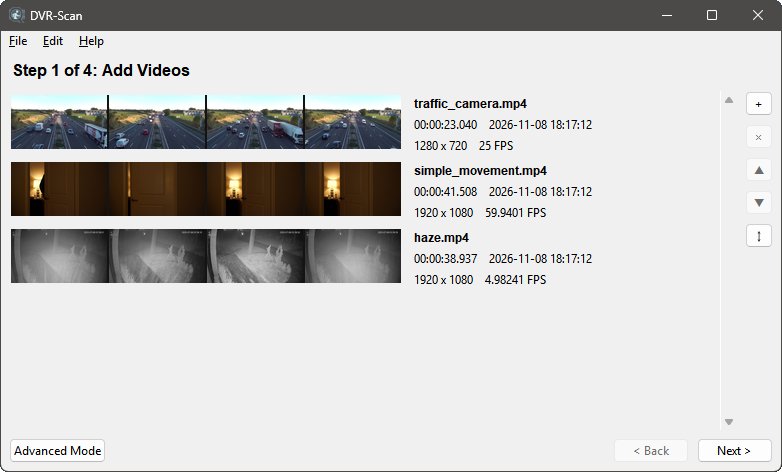
The wizard opens on the Add Videos step. Click the drop zone (or drag and drop files onto the window) to add one or more videos, then press Next:
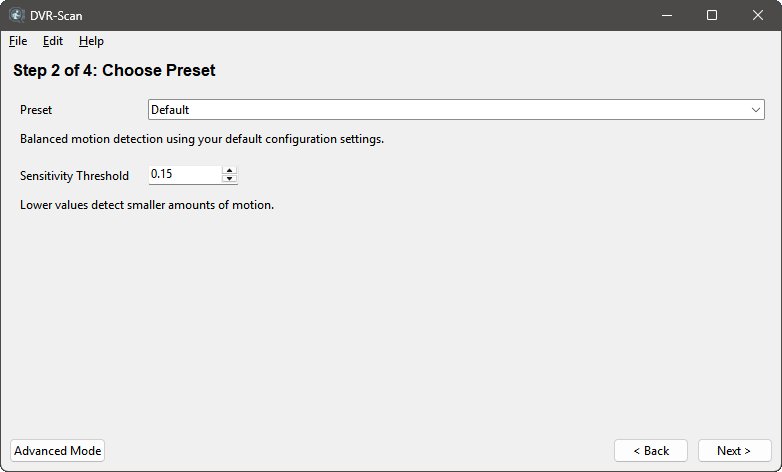
Next, pick a Preset. Default uses your saved settings, High Sensitivity catches faint or small motion, Low Sensitivity reduces false detections, and Fast Scan trades accuracy for speed (see Presets for the settings each one changes). You can also adjust the sensitivity threshold directly, where lower values detect smaller amounts of motion (if motion you expect is not detected, see this FAQ entry):
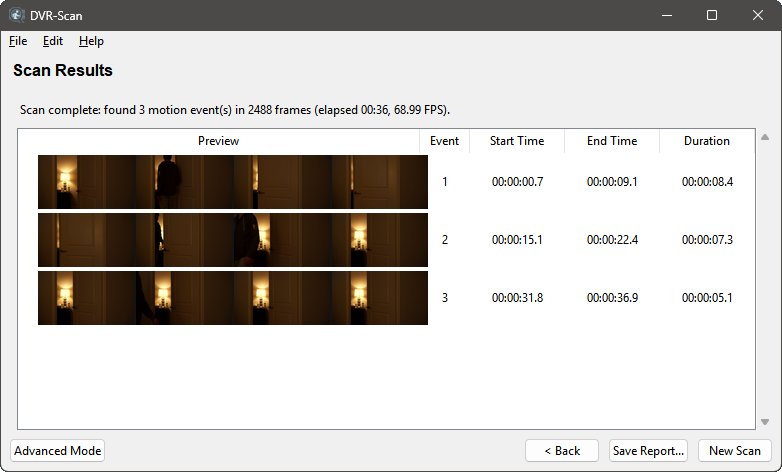
On the Choose Output step, select how events should be saved (or Scan Only to just produce a report), review your choices, and press Start Scan. The scan runs in place, and the detected events are listed when it finishes:
New installs start in the wizard, while existing installs keep Advanced Mode. To change which view opens at startup, use File -> Startup Mode in either view (this sets the startup-mode config option). To force a view for a single launch, run dvr-scan-app --startup-mode wizard or dvr-scan-app --startup-mode advanced.
Advanced Mode
Start by clicking the Add button to add one or more videos:

You can select several videos at once with Shift-click, Ctrl-click, or Command-click on Mac. Select every video with Ctrl + A (Command + A on Mac). To remove the selected videos, use the Delete key or the Remove button. These actions are also available from the Edit menu.
To extract and save the motion events from the input, click the Start button. You will be prompted for a location to save the events to, after which scanning will begin in a separate progress window. Once complete, each event will be saved to the output folder you selected.
To tune motion sensitivity, go to Settings -> Motion and adjust threshold, where lower values are more sensitive to motion, and higher values are less sensitive. You can also adjust event settings and more:

See the config option documentation for a detailed description of each setting.
Region Editor
The Region Editor allows you to limit motion detection to specific areas of the frame. Once you have a video loaded, check "Set Regions" and press the "Region Editor" button:

You can use the mouse to add or move points when editing regions. Left click to add a new point, or drag an existing one. Right click can be used to delete a point, and to add/remove shapes.
To begin scanning, close the region editor, and click the Start button. You will be prompted to save the regions you have created before scanning so you can re-use them if required.
Regions
Regions are a set of points creating a closed shape. A rectangle will be created by default for you to modify.

Regions are edited individually, but all regions are used when scanning. To add a new shape, right click anywhere on the frame.

Regions can be selected using the Active Region selector at the bottom left, or cycled by using the Tab key. Note that only one region can be edited at a time.
By enabling mask mode (Toggle Mask at the bottom right), you can see the exact areas of the frame that DVR-Scan will consider for motion:

Regions can be saved/loaded for reusing across videos or editing via the File menu.
Controls
Click Help -> Show Controls or press Ctrl + H (Command + H on Mac) to display all keyboard and mouse controls. You can move the canvas by holding Ctrl (Command on Mac) and dragging with left-click. The cursor icon should change depending on what mode the editor is in.
Most actions have keyboard shortcuts displayed beside the menu item. You can undo/redo any modifications or deletions when working on the regions by clicking Edit -> Undo/Redo or using your system's undo/redo keys.